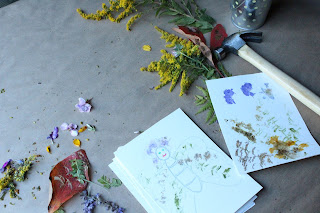
With the kids going back to school there came the first signs of fall. Leaves are starting to change color and fall from the trees, the golden rod is in full bloom and the farmers markets are starting to offer the wonderful squash and pumpkins that you only see between now and Thanksgiving. The local farm has its corn pit ready and we've already done the first of our apple picking and pie making.
This also means that walking the dog now becomes a foraging exercise as I am handed 'special' leaves, acorns and pine cones that need to be saved 'forever'. (Well, at least until they've been through the wash cycle at least once if not twice in the machine!)
So after a walk earlier this week I decided to show my little guy something else to do with some of those treasures 'Hammer Painting'. I mean what little boy can resist the idea of being told he can hammer really hard to create.
The colors seen in fresh leaves and flowers come from chemicals called pigments. Painting in the earliest times always required making use of these natural pigments found in the plants around them. This exercise was also then a great lesson in demonstrating how flowers and leaves store their colors in their leaves and petals, and how we can (through crushing the plant) use these pigments to create paint.
You will need:
Selection of flowers and leaves (Please don't pick wild flowers ours came from our yard)
Water color Paper (Or other art paper)
Baking Parchment Paper
Hammer
Board to go under picture or do it on a surface you don't mind being dented
Step 1
Place your watercolor paper on a board. Have your child lay out the flowers and leaves they have collected to make a picture, my older daughter actually drew the outline of a figure and then used the petals and leaves around the drawing to fill in the details.
Step 2
Place the parchment paper over the top of the flowers. My little guy found it easier if we held this paper in place with tape while he hammered to stop it moving around.
Step 3
Once you have had a hammering time, this may take a while if you have a four year old! You can pull back the parchment paper and dust of the flower scraps to reveal your masterpiece.
My daughter took hers out to the barn and preferred adding elements piece by piece to create her final picture.
I think my boys enjoyed this on a 'Mommy is letting me hit stuff' level while my daughter really enjoyed experimenting with which flowers left which colors and using things like ferns to create wonderful shapes within her pictures.


No comments:
Post a Comment